YOUR TRUSTED SHOE SUPPLIER SINCE 2010
FREE SHIPPING OVER $175
PRICE BEAT GUARANTEE

Custom Shoes Ordering

Step by step guide

The custom shoe design process and ordering process is quite easy. Just follow the bellow steps to design your shoe and place an order. If you need any additional help, please do contact us, we'll get back to you in less then 24 hours.

Step 1
step-1
1
From the Custom Shoe page, select the category of shoes you're interested in.
Step 2
step-2
2
From the category page, select the specific style you're interested in.
Step 3
step-1
3
On the pop up window you will be guided through your selections for toe type, and for some style finish type.
A note on finish types:
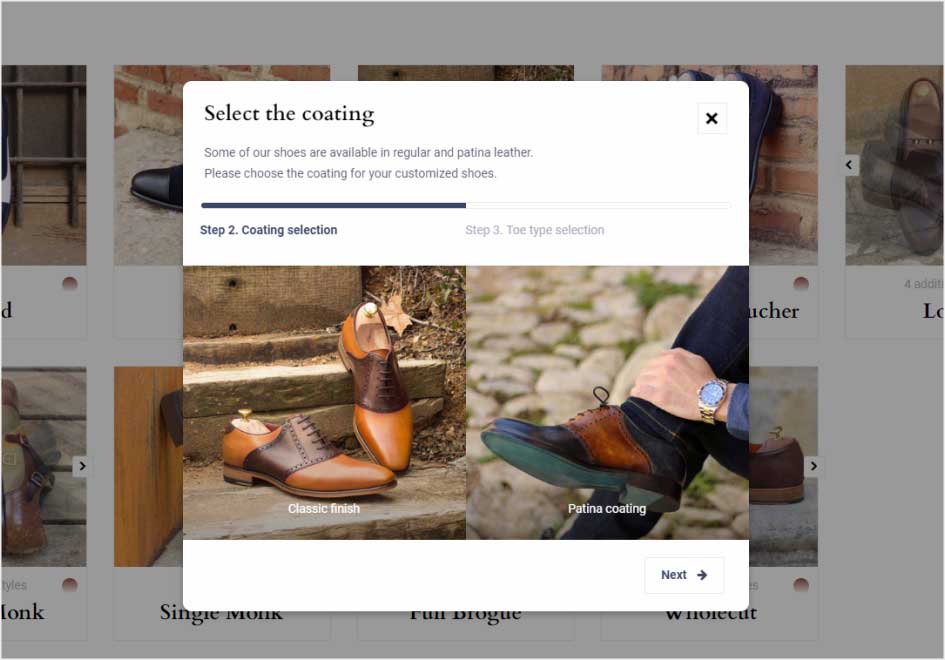
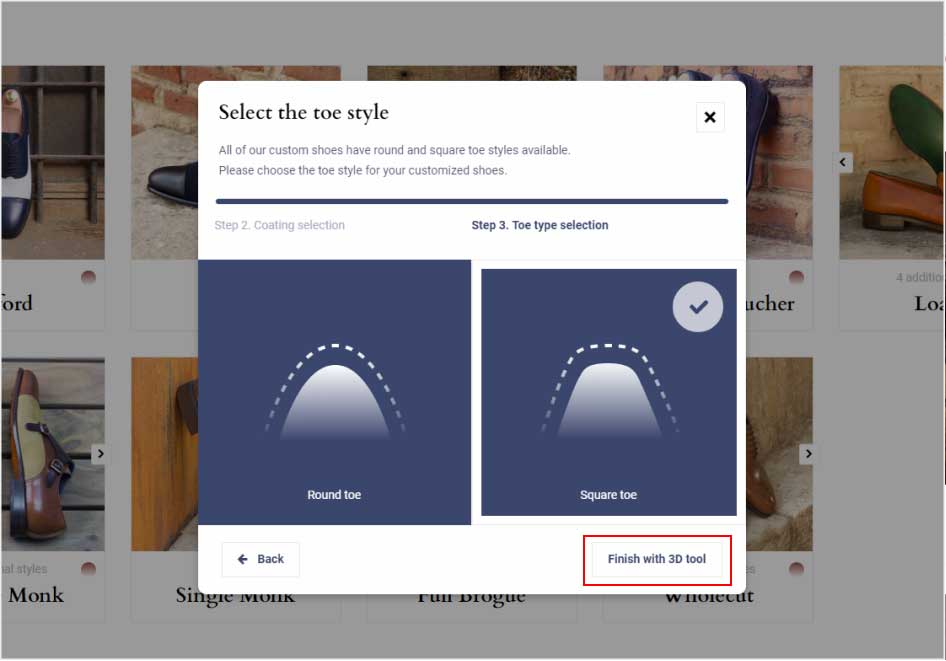
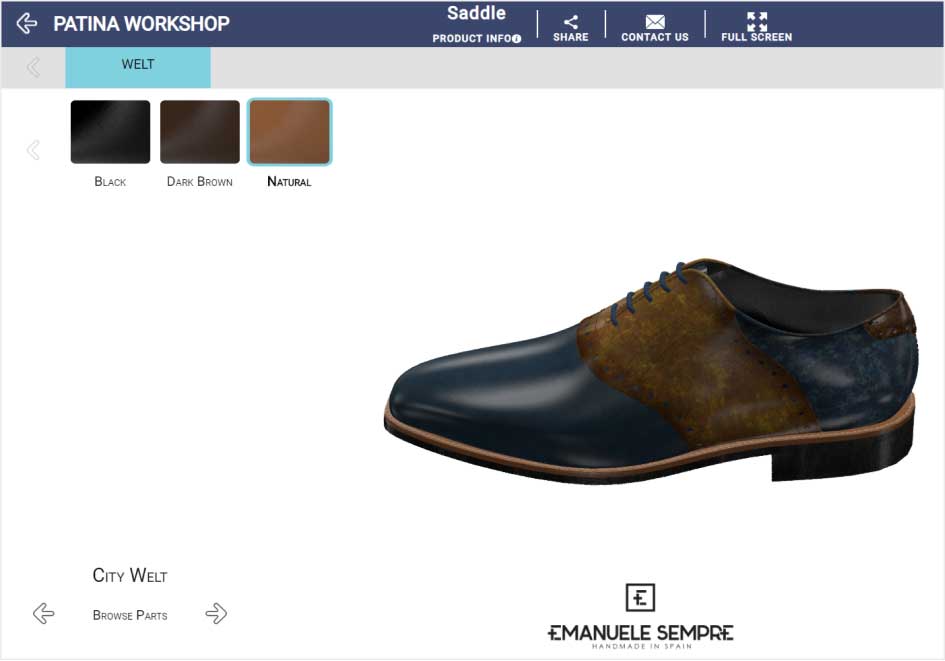
  • For some of our styles a "patina" finish is available. This is a very unique hand finished method in which the finish is applied in such a way as to give a fading appearance / aging appearance to the finish. Our factory can do multiple types of patina finish. They are absolutely gorgeous and unique, we highly recommend looking at our Get Inspired gallery for examples.
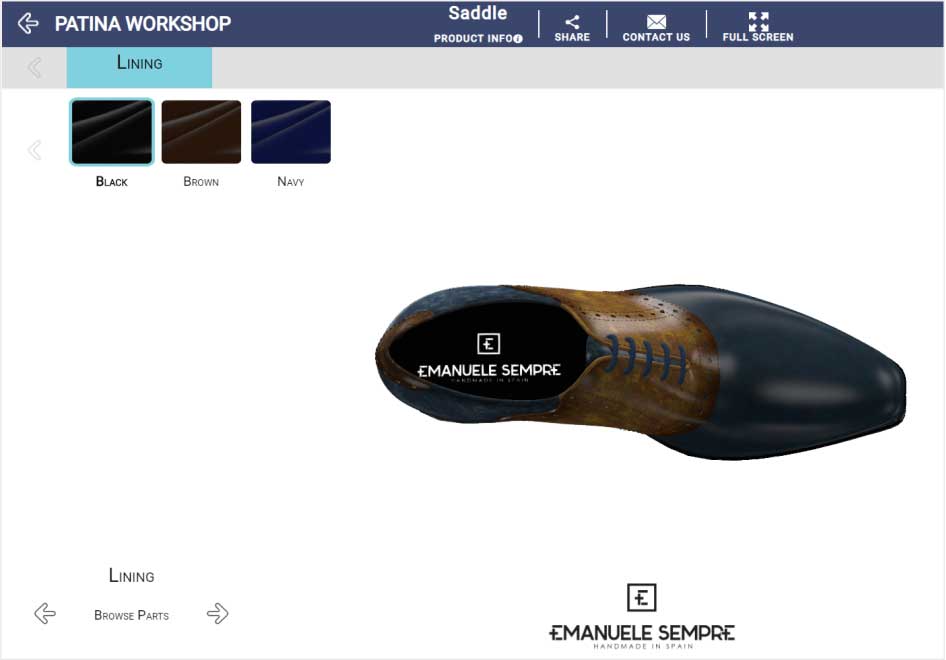
Step 4
step-4
4
Once toe type and finish type (where applicable) are selected you will click the "Finish width 3D tool" button. This will launch or 3D shoe design tool.
Step 5
step-5
5
Please be patient as the 3D shoe design tool loads.

3D Design Tool

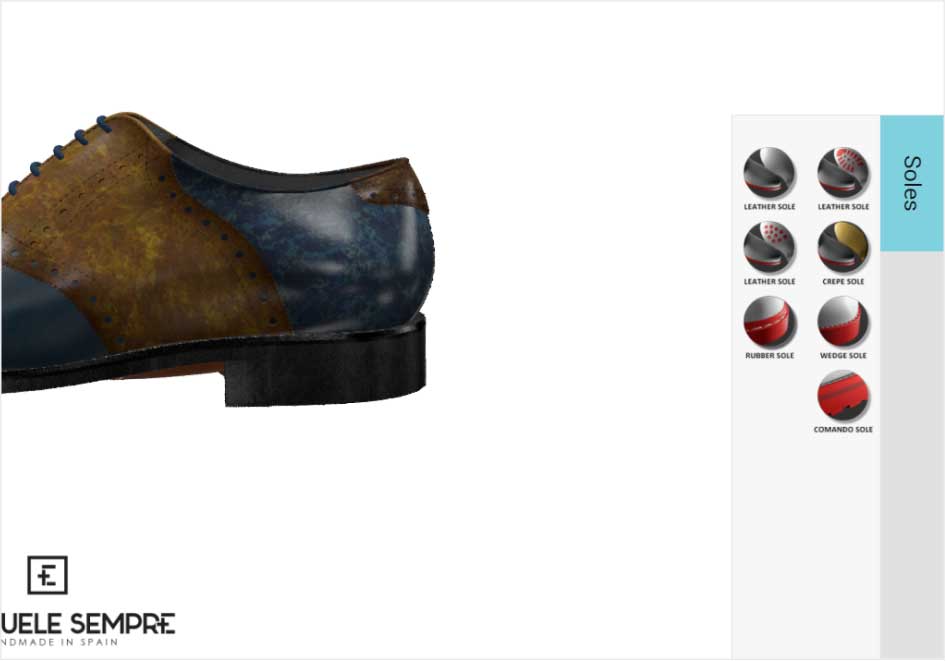
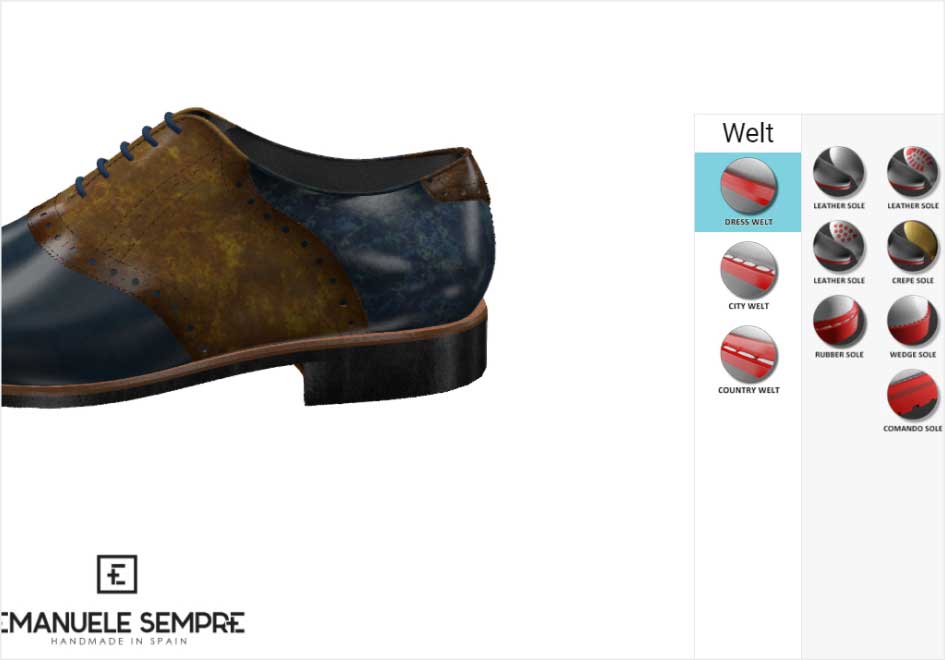
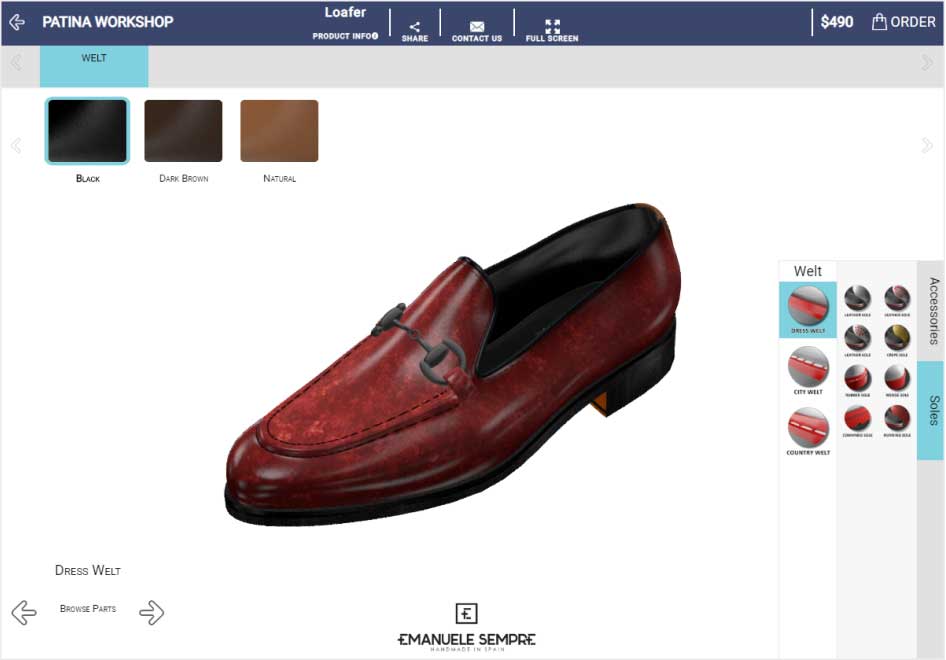
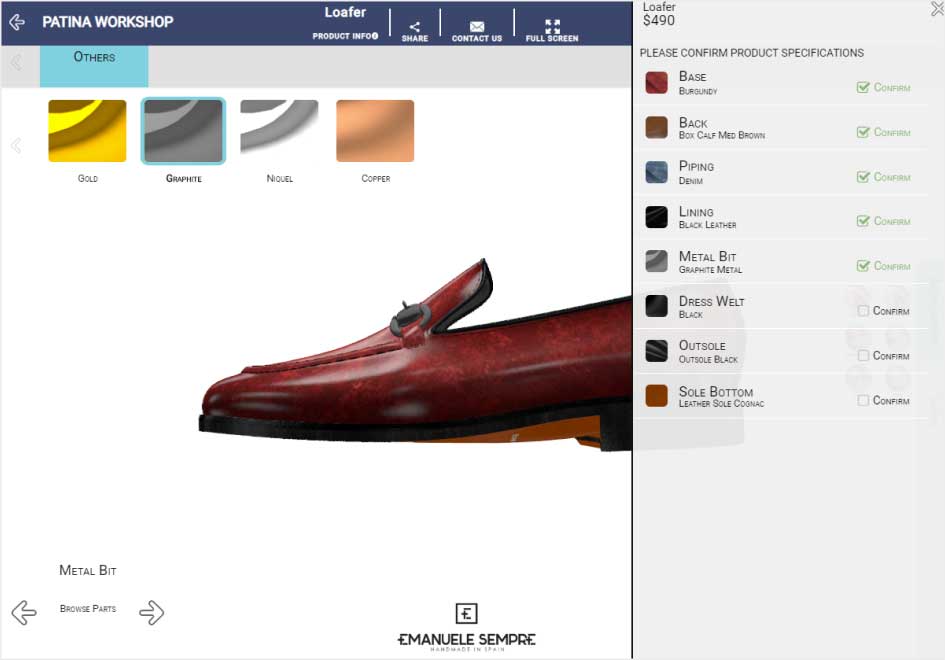
Once your shoe loads on the screen you can customize the leather type, leather color, insole color, sole type, sole color, vamp type (for some styles), toe detailing (for some styles), laces color (when applicable), hardware color (when applicable).

Use the left and right arrows on the bottom left of the screen to highlight different portions of the shoe to be customized. You can also highlight a specific part of the shoe to be customized by simply clicking on it.

Step 6
step-6
6
To change the leather type, select a portion of the shoe to highlight it. You will see on the top of the page leather type options (Box Calf, Polished Calf, Painted Calf, etc). Click on the leather type you're interested in. This will then display the color swatches for that specific leather. Select the color you want for that type of leather by clicking on it. That portion of the shoe will now be updated by your selection.

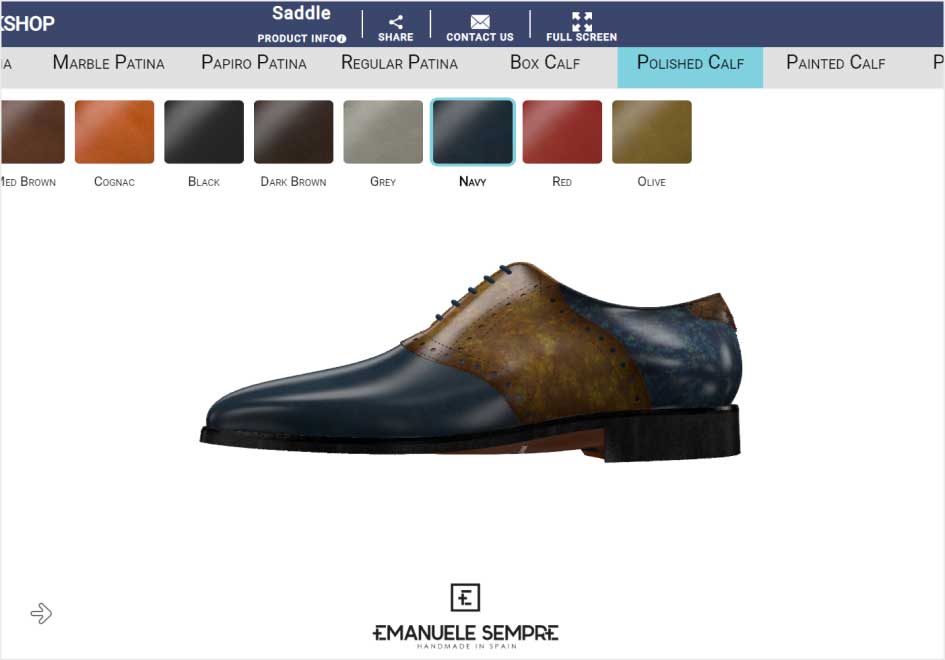
Select any and all parts of the shoe that you want to change the leather/leather color for, and go ahead and do that. Please note, due to the construction of some shoes, only one type of leather/color can be select for the entire shoe.
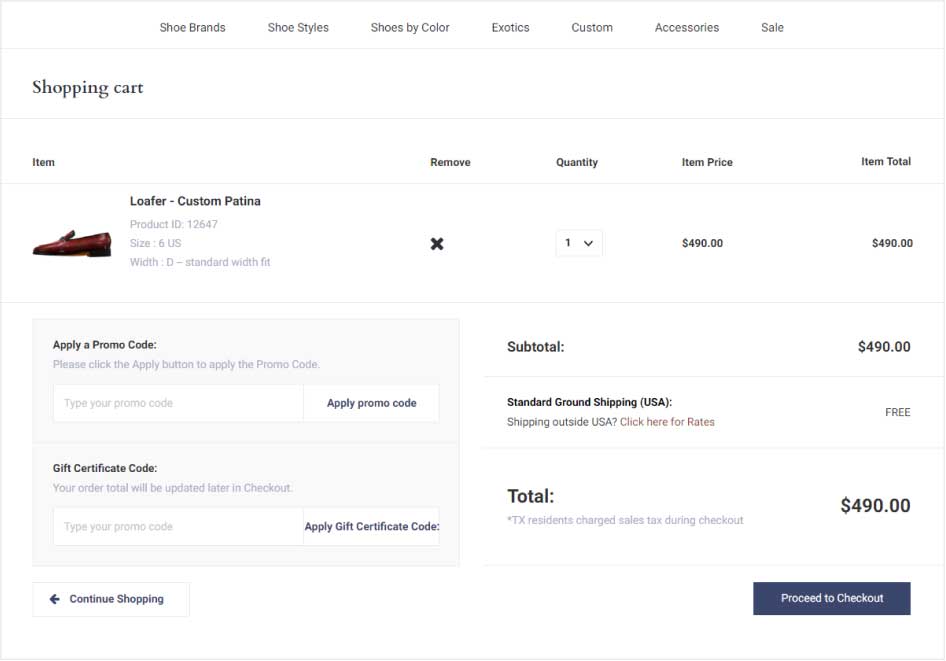
Step 7
step-7
7
Now select the insole (lining) of the shoe, once done the color options for the shoe insole will appear at the top of the page. Click your desired color and your shoe will be updated accordingly.
Step 8
step-8
8
Now select the sole of the shoe. At the bottom right of the page, if applicable, different sole types will show (leather, rubber, leather with rubber inserts, etc). Select the top type you're interested in.
Step 9
step-9
9
While you're working on your sole, notice at the top of the page the color swatches showing the available sole colors. Select your desired sole color and your shoe will be updated accordingly.
Step 10
step-10
10
For some dress shoes you can customize the Welt of the shoe. This is the connection point between the leather and the sole. Highlight the Welt, and then notice at the bottom right of the screen your different Welt options. Select once and your shoe will be updated.
Step 11
step-11
11
For some loafers you can customize the Vamp (top) of the shoe, to give the shoe a plain vamp, penny loafer style vamp, twist tie, etc. Highlight the vamp of the shoe and in the bottom right of your screen select your desired vamp. Your shoe will now be updated.
Step 12
step-12
12
For certain styles other options are customizable such as the color of hardware, embroidery, etc. Simply highlight that portion of the shoe and select from the available options to update it to your liking.

Ordering

Step 13
step-13
13
Once you have customized your dream shoe to your liking, click the ORDER button at the top right of the screen. This will trigger selection confirmation window. Go through each option you select and click the checkbox to confirm that option. After the last checkbox is checked you will be redirected to the Size Selection page.
Step 14
step-14
14

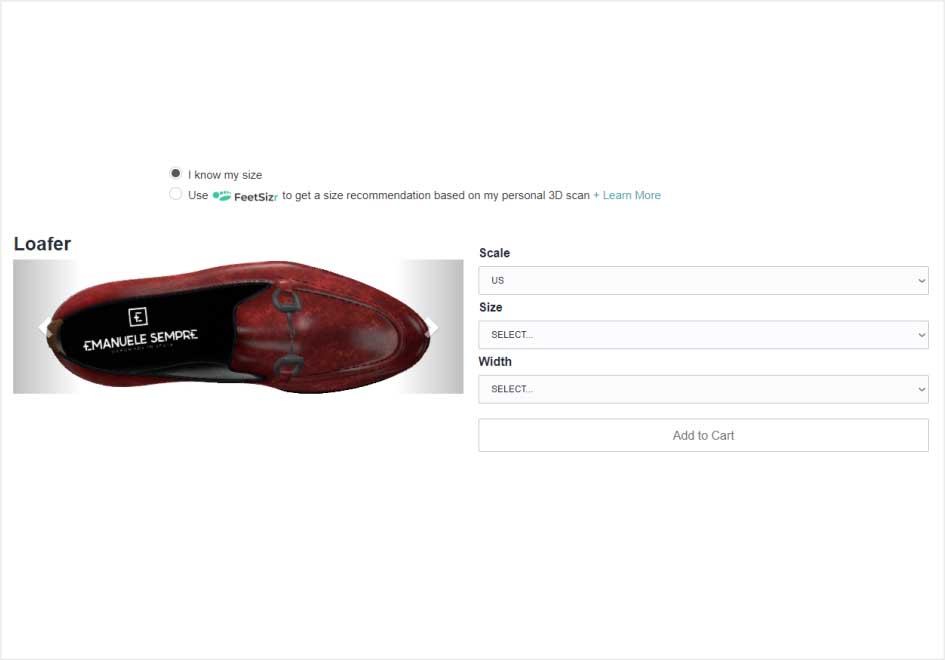
On the size selection page select the size you'd like to order. Make sure to select the correct country size scale (it defaults to USA), size, and width (Medium (D), Wide (EE)).

Please note, if you are unsure of size you can download the FeetSizr shoe measuring app for your phone and measure you feet using the app, and then come back and enter your FeetSizr ID on this page to confirm the correct size you need for this style.

Step 15
step-15
15
When your size is selected, click Add to Cart. You can now proceed through our website checkout pages to complete your order.
Step 16
step-16
16
Orders take approximately 4 weeks to be built from the time of the order. Once your order ships you will receive a tracking number so that you can track your order.

If you have any questions at all on the custom shoe design process please don't hesitate to ask. We're here to help.

Contact us